Tuesday, December 16, 2014

Teaching Basic Circuitry the Holiday Way!

If you've seen my last post here, you've probably seen this little bauble.


This is the final product created by the no-solder kit I'm selling to fund my Gold Award project. The idea is that the kit is easy to assemble as a kit to teach younger kids about Parallel and Series Circuits, while still leaving something cool for them to take home. Each bauble costs less than a dollar to make*, and all the materials can be bought with a trip to a craft store and an electronics store, so I'd say it's pretty successful!

*If you buy batteries online, as most coin batteries I've seen are insanely expensive at grocery stores. I bought 100 for $17 from this website.

Here's what you'll need: 

1 Miniature Glass Ornament
Some silver ribbon (I used Easter Basket filling)
2 Pieces of Wire
1 Lithium Coin Battery

1 LED

A hot glue gun
A pencil
Some tape (electrical tape works best)
Scissors

How to make your ornament:
Carefully pull the silver top off the glass ornament, then pull the pin out.


Use a pencil to push the silver ribbon into the ornament.
Put a piece of tape on the inside of the silver ornament top so that it covers the two holes. Poke one of the leads of the LED through the tape and through the hole so that the bulb is UNDER the ornament top.


Use the hot glue gun to secure the LED to underside of the lid so that the bulb sticks out by about half an inch. 


Then glue the lid back to the top of the ornament so that the LED is hidden by the silver ribbons


Loop one of the metal ends of the black wire around the shorter lead on the LED, and secure it with hot glue or tape.  Make sure the wire is directly touching the lead! Then, do the same with the red wire on the longer lead.

If you're interested in doing the experiments (which require 2 or more baubles), here are the instructions I'm giving out with the kit below:

PARALLEL AND SERIES CIRCUIT EXPERIMENT


Series circuits are created by wiring all the components of a circuit in a line. The electricity moves straight from one component to the next. They’re useful when you want a circuit to shut down completely if it’s damaged. 

Just connect the wires red to black for series, and make sure the red wire goes to the positive side of  the battery, and the black to the negative. 

What happens when you add more ornaments to the chain? Try touching a paperclip to both leads of an LED in the circuit. What happens? Why is this? 


Parallel Circuits are created when each component gets its energy directly from the same energy source. They’re useful when you want each component to work independently of each other, or if you don’t want damage to one component to affect the others. 


For a Parallel circuit, the black or red wires for each ornament connect with the black or red wire leads of the next LED. The last black wire in the chain goes to the negative side of the battery, the last red wire to the positive. 

What happens when you add more ornaments to this chain? Try touching a paperclip to both leads of an LED in the circuit. What happens? Why is this? 


Finally, to finalize the ornament, tape the other end of the red wire to the positive side of the battery, and the black wire to the negative. The LED should light up. If it doesn’t try swapping the wires or moving the LED’s leads. If they’re in contact with the metal of the ornament top, the LED won’t light.

I hope this lifts your holiday spirits! It's fairly durable (I was able to wear one on a necklace all day at school with minimal problems.) and it looks good. Try it as an ornament, a necklace, and augmentation to an ugly sweater, or just a shiny reminder to say "Happy Holidays!" 

And if you happen to make one, please, send me a picture at rach.s.thompson@gmail.com. I'd love to see it!

Friday, December 12, 2014

Makerspace, Part 2: The Plan.

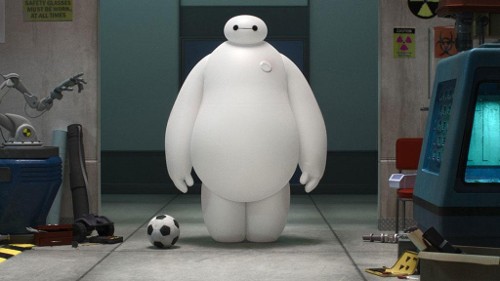
Last week, I finally got to have my first meeting with the middle school Technology club I'm working with to create the Makerspace. We talked about what a Makerspace was, how we were planning to use it in the school, and the various bits and pieces of old projects that I brought to show what kinds of things could be made in a Makerspace. Basically, it was a condensed version of this post, with a few pictures from Big Hero 6 and Iron Man 3 as reference points.

Good movie...  but it was no Wreck-it-Ralph. 

At the end of the meeting, I had ever student write down on their slip of paper the top ten things they wanted to be able to make/learn in the technology club. Over the weekend, I looked through all the answers I got, and came up with the five main units that would be the most useful and interesting to kick off the Makerspace and the Tech Club. The Technology club has two types of meetings - "Class" meetings, which teach skills like the one's seen below, and "Business" meetings, where we'd focus more on the Makerspace itself, and where members would have time to share the projects they've been working on (THAT is for a different post). But the introductory skills are important for the students with little or no experience. So here's what I've put together: 


1. Programming
 This is the obvious one, but I've put it as the first unit because it's a vital skill so many of the other projects the students were interested in, and because it doesn't require expensive materials. I'm working on lesson plans for a programming intro class for Scratch, which will hopefully give enough of an introduction that the students will feel comfortable working on Codecademy tutorials or learning from other online resources


2. Robotics
These kids love robotics almost as much as I do. The issue here is limited time and materials. I'm planning on doing two classes with Mindstorms Ev3 - one for building, one for programming. I'd also like to incorporate robotics into an Arduino introduction later on - I have an RC car that I robotized with an Arduino that would make a good example.


3. Circuitry
While I'd actually prefer this unit before robotics, the littleBits are one of the more expensive items in the budget, and, while I have an Ev3 kit at home that I could bring as an example, the same isn't true here.


4. Computers
This is kind of a catch-all unit. Here I definitely want to have a class on the Raspberry Pi, but I also want to bring in some of the other Technology Club Alumni to teach classes on things I'm not as familiar with, like App programming and Web Design. (It's interesting to see how our individual interests were foreshadowed through Tech Club and the technology class. The ones who spent all their time on the iPod touches now program them, the ones who spent all their time tweaking Powerpoints and Tshirt designs have gone into 3D animation or computer graphic design. And yours truly MAY have turned in a final paper analyzing potential uses for robots that could create their own languages after researching this. I really should post it here if I can find it.)


5. 3D Printing
I have never had the opportunity to use a 3D printer, and I could not be more excited to learn. That's why this unit is last - I know the least about it, and I need that time to learn. I'm planning on getting the Printrbot kit, and using Google Sketchup and Autodesk inventor to do the modeling, since our school system already has that software.


These are the things we decided would be the most useful. I've said before that you don't need expensive tools to make a Makerspace, and I stand by that statement. But good tools make making more accessible, and especially in a school setting, that's important. And tools cost money.
About $1,300 worth of money, not counting shipping or storage.

I'm looking at a couple different ways of doing money-earning.  For the more expensive kits, I've talked to my sponsor about using DonorsChoose. It seems like a great program, and I'd appreciate the help in offsetting the cost. However, with finals rapidly approaching, we haven't had the chance to talk to the school administration yet. So I've started with some simpler money-earning opportunities. Right now, I'm creating kits for making small light up ornaments to teach younger kids about the basics of circuitry. The kits would also be good for making a string of lights, good for teaching Parallel vs. Series. Plus, who doesn't love holiday themed illumination? Here's a picture of the prototype. I'll be posting a tutorial soon.


I'm selling the kits to local scout troops as an end of year craft project and my goal is to raise about $100 to start off with.

And finally, while I can't expect to rely on donations, I had the opportunity over Thanksgiving break to collect some of my great-grandfather's old tools for use in the Makerspace, which I cleaned up and labeled.


It wasn't anything too fancy - just screwdrivers, wrenches, a level, things that would be useful for building or disassembling small projects. But that toolbox has officially become the first thing in the Makerspace.


It's a long road ahead, but we have a plan. Let the making commence!

PS: One last thing. One of our main concerns with the technology club is the participation of girls. I was one of two girls out of about fifteen people at the clubs inception, a ratio that improved a little  the next year, I suspect because both of us were so active in the club. Now, she's actually come back to help with my project. But we still see the same problem. There were only two girls at the meeting and about twenty boys. Do any of you have suggestions for getting more girls involved? 

Thursday, November 27, 2014

Why Artificial Intelligence IS Real Intelligence


One of the most common arguments I've seen in the face of AI research is that computers aren't REALLY intelligent. They merely emulate intelligence, something that is inherent to biological life, or , in some views, only humans. In his article "Artificial Intelligence, Really, Is Pseudo-Intelligence," Alva Noë argues that computers lack 'drive': they can't attach meaning to things, and therefore they can't have wants like biological beings do.

Lets say, right now, I want a chocolate bar. "Want" is a pretty complex term. Does it refer to the lack of calories, calcium, sugar, magnesium, or even serotonin that my body's sensors detect in my bloodstream? Does it refer to the physical symptoms that manifest in my stomach and mouth that my brain recognizes, or the memory of how a chocolate bar negated these symptoms a week ago? Does it refer to my memories of having a chocolate bar while at the computer that have taught me chocolate is the "right" choice in this situation, just one of many learned behaviors? Does it refer to an emotional component, a combination of learned behavior and brain chemical levels that tell me that chocolate makes me 'happy'?

"Want" encompasses all of these things. It's complex, and it's more complex than anything AI can do right now as a whole. But when you break it down this way, what up there can we do that computers can't? We can create programs that take information from sensors. We can create programs that can access memories and find patterns, and determine a course of action based on that pattern. That's all intelligence is. The human mind, our meanings and desires, are only complex derivatives of very basic mechanical things, in the same way that the leaves on a vine create a beautiful spiraling pattern simply as a way of maximizing the sun coverage each leaf gets. Biological machines aren't inherently different from artificial machines. They've just had a head start. 


Another argument he uses is that of understanding. Computers can't understand, they can only perform the actions they are told to. One example is that of the Translator's Room. A human is locked in a room with nothing but a pen, and dictionaries that translate one foreign language into another. The human knows neither of these languages. However, every day, they receive papers with writing in one of the languages. Using the books, they are able to perfectly translate the writing into the other language before passing the paper back out of the room. They can complete this task despite not 'understanding' either language. 

This argument doesn't negate the possibility of artificial intelligence. It shows that a system can only do so much with limited information. If the books in the Translator's Room scenario had a picture for each word they translated, the human would be able to understand another component to the sentences they wrote. What if they were familiar pictures? Just like Helen Keller, with her hand underneath the spigot, the human could recognize water in any language if they just had another reference point. Another piece of information. Could that be considered understanding? A computer can store associations and memories just as a human mind can, and the more data a computer has access to, the more associations can be made. Isn't that all that understanding is? A summary of our experiences and the patterns we've derived from them? 


The Jeopardy-Playing robot, Watson, which the article cites as an example of a lack of understanding THRIVES on those summaries. It doesn't have any visual or physical references, which make up most of our human understanding. But it knows a river is a flowing body of water. It knows water is a compound in a liquid state that is common on Earth, and necessary for human life. It knows flowing is a type of movement only fluids, like liquid, can achieve. Even without visual reference, how is this not understanding? Watson can induct. It can deduct. And it can use those abilities to answer questions.

I'd argue that's what intelligence is. Our ability to derive patterns from information and act using those patterns. That ability is just as real in computers as in any biological creature. It's just our job to prepare computers to use it.

Monday, November 24, 2014

Super Secret Special Project: Makerspace!: A Long Introduction.


I've finally caught up with my teasers! I've been pretty busy with school, scouts, other projects, and, yes, my Gold Award project, where I'm hoping to build a Makerspace at my old middle school!

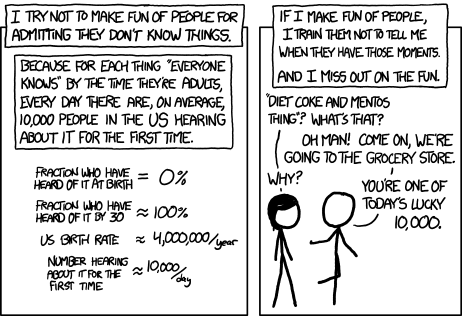
Note: For the uninitiated (credit xkcd)...


A Makerspace, Hackerspace, FabLab, Techshop, etc... is a space devoted to providing materials, instruction, and community to anyone interested in creating. It goes hand in hand with movements like OpenSource, STEAM education, and free information. A Makerspace wants everyone to be able to make, and to find other people who make.

To give a little background - my middle school librarian was an awesome teacher, interested in sharing information, technology, and connection through the library. She started the technology club my first year at our school, where teachers could come and talk about the technology they wanted to use in the classroom (e.g. Google Earth Tours, iPod touches, online video-editing software, etc) and it was up to us to A) figure out how to use the technology, and B) teach the teachers once we figured it out. The club was only the beginning. By the end of the year, 13 of us were enrolled in the Independent Study Tech Team class, taught in the library, by the librarian, for an entire class period each day. The teacher brought some brilliant ideas to the class: 20% time, bringing in projects from other classes to try out the technology, etc. It was basically a maker class! The only thing we lacked was materials.


In the library, we had three things we could work on: Software on the computers (the basics of Windows 7 plus a few class specific things, like Alice), thirty-something iPod touches we rented out to classes, and books. This was a great starting point, but I kept having to bring in my own materials for 20% time to feed my interest in robotics and programming. The teacher introduced me to the idea of a Makerspace my eighth grade year, and the more research I did the more I liked it. The materials I've collected are important to the kinds of projects I get to do - I hate the idea that another kid somewhere won't get to learn about robotics because they don't have access to a mindstorms, or an arduino to learn on.

Ninth grade taught me how useful a Makerspace could be. If you've even taken just a quick look at this blog, you can see I took Tech Theatre, and made full use of the workshop we had available. That workshop is my favorite place in the entire school, because it has everything you need to bring a design to life. Tech Theatre may not be a class devoted to engineering, but I feel that, because of the workshop, and because of the self driven nature of the class and the projects, it does a better job of teaching problem solving, design, and engineering skills than the note-and-test heavy engineering-specific class I took.


I decided to try and find a nearby Makerspace - it turns out the nearest is an hour's round trip from my house. I got a tour to see how the space functioned. It was REALLY cool, but I noticed that it was definitely geared more toward the adult, experienced engineer in price range, classes and tools available, and supervision. That wasn't quite what I was looking for, so I contacted my old librarian to ask her thoughts on creating a Makerspace in Plano... and a few weeks later, she's my Gold Award Project Advisor,  I've sent a powerpoint proposal to the principal of the school, and I'm prepping one to send to my local public libraries! (See the powerpoint here, if you're interested)


What's the plan? Well, the main issue is cost. I spent a long time looking up the costs of materials I'd like to include, and, to say the least, cost was high. I'm planning on organizing a tool drive to try and get some of the cheaper items, like paintbrushes and screwdrivers, old toys to take apart, Ewaste, and the like. Some of the rest will be funded by club member fees, but for a lot of it I'm looking at funding online through Donorschoose.org, or something similar.


Another constraint is space. The area we're looking at converting is currently storage for books that get lent out in English classes for reading assignments. We get a grand total of one bookshelf for storage, so we'll have to use it wisely. This is a real model of the space I made in Sketchup. I'm betting the Technology club will be happy to have it. Right now, I'm still waiting on the final green light from the principal, which will hopefully come in the next couple of weeks. Then I can turn in my paperwork, and get the ball rolling! Expect to see more about this soon, and all the little mini-projects it entails.

(NOTE: I'm going to publish this as is, but it's a little outdated now. I've since had my project fully approved, and the first meeting with the students will be next week! I even had the chance to talk about my project at the Girl Scout Leadership Institute at this year's national convention. I'm super excited to get started. If any of you have ideas for fundraising, or know of good projects or resources for a middle school Makerspace, please comment below! I'd love to hear what you think.)

Sunday, November 23, 2014

Trying out Web Design

So, as I posted here earlier, I'm planning on revamping this blog's appearance. This isn't a random burst of inspiration: this year, for my Technical Theatre class, we're required to create a digital portfolio. That's practically what I've been using the blog for so far, so, although I'm creating a separate website for the portfolio specifically, I'd like the two to have a unifying theme. Also, I may be using this blog to document my Gold Award project (which was approved yesterday! Expect the post to FINALLY make it up later this week.) I want it to look more professional, and, in general, more "me." So, here are the steps I've taken so far to try a whole new kind of coding.

Step One:  Learn how to code.


I'm going to be painfully honest here: prior to this project, I had never used HTML before. Never. Not once in my life. Not even a little. It's one of those things that would have been useful that I just never did. Thankfully, it's 2014 and the internet flourishes. I tried out a couple of different online tutorials, and by far the best one was the Codecademy: Make a Website tutorial, covering HTML and CSS. It's straightforward, it's fast (I did an hour here and there over a week and finished easily), and it's what I needed to know.

Even later, when I actually started coding, I could check the Codeacademy HTML and CSS glossaries, which made for handy cheat sheets, and had everything covered in the course, and more.

A word of warning though: The website recommends the javascript-based "Build an Interactive Website" tutorial immediately after the one I took. For that tutorial, you really do need to have a decent understanding of Javascript before you take the plunge. I left it pretty thoroughly confused after the first few problems.  I started the Javascript tutorial a few days ago, and it's pretty basic stuff, but I'm hoping when I finish I can take another stab at it.

Step Two: Get a good editor to work in.


For most of my day-to-day programming, I use Textmate. But I got a good recommendation from a friend as far as a good Wed-Design specific text editor: Brackets.
And I have to agree: Brackets is the best.

There are two things that make Brackets really useful:
One, it keeps all your files organized in the sidebar, where they're easily accessible without making you go dig through folders and directories. All of them. Pictures, HTML, CSS, add-on libraries. I'm not very organized on my own, so this was a LIFE CHANGING revelation, and the second most useful thing about the program.

Two, it comes with a way of previewing your website live as you make changes. It comes with the download, and you need Google Chrome to use it. But there was nothing better than being able to tap away on my keyboard and see the elements of the website come to life in front of me. It's not always perfect. I usually had to reload the page on chrome after any big changes. But it was helpful both in designing the page and understanding the code I was designing with.

Step Three: Start Designing!

I'm working specifically on the Portfolio website right now. I have a plan drawn out (which I'll upload once I redraw on something that isn't my English HW). Once I figured out how everything fit together , it was really fun to manipulate. I used Bootstrap to make the designing a little easier, which was super handy, and there's a lot of support out there for it. This was what I had at the end of the day:


The idea is to have each project organized on the timeline from most to least recent. Each one will be contained in a box with it's title, a short description, a picture, and a link to a page with more information. What's here isn't quite right either - I want the red timeline thinner, but that's a challenge for another day.

I think I want to try and use Rails to make adding and updating projects easier. I tried the Rails for Zombies tutorial a few months ago, but I never felt really comfortable with the material. I guess it's time to retry, maybe with the Codecademy tutorial as well? I figure that will be useful for a blog design too! At least I don't need anything solid to turn in until April.

So that's my Thanksgiving break plan. I'll also be working on my Makerspace plans (Look for a post! I promise!), school work (bleck), and an interesting proposal I got from my Tech Director about using robots to move set pieces for this year's musical (More on that later, I hope).  Not much of a break, but I'm just happy to have a few days I don't have to get up at 7 am if I don't want to. How about you guys? What are your plans?


Thursday, November 6, 2014

Changes!

Just a quick heads up that I'm doing a complete overhaul on this blog's appearance, title, and URL. I'm planning on using it as a part of my Gold Award project (I've had a post drafted for MONTHS about it now, which, hopefully, I'll post later this week. But school has really knocked the wind out of me. Basically: I'm building Makerspaces at schools in my area.)
Anyway, changing title, changing url, etc. Eventually I want to move it to it's own URL, but that probably won't happen until at earliest Thanksgiving. So, apologies for any inconvenience! This should get sorted out pretty soon.

Sunday, September 21, 2014

The Theatre Tech Magnetic Survival Bracelet

I'm a sucker for simple solutions for even the most superficial problems, so when I saw this magnetic bracelet for holding screws and nails during projects, I was sold from the start. But I needed something before I had to go work at the Children's theatre the next night (summer jobs, guys). Plus, that bracelet looked heavy, slippery, and easily scratched up. So I made a quick raid through my craft box, and ended up with The Theatre Tech's Paracord Survival Bracelet.


Pretty sweet, right? And it's magnetic enough to hold even 3in  screws in place while you walk around. 


Here's what you'll need:

Paracord (Measure around your wrist in inches, taking into account the fit you want, and, for this project, add an inch. Cut a foot of paracord for each inch. Ex. If your wrist was 8 in in diameter, you should cut 9 feet of paracord) Pick a color that makes you happy!


A Side Release Buckle (Mine was cut off an old backpack, wider is better for this project)

8-10 STRONG Bar Magnets, about an inch long each.
And your tools:

Hot glue (optional, but recommended)

A pair of scissors

A lighter or match

Measuring tape or ribbon

Start your bracelet like you would any other paracord bracelet, with two big exceptions:
1. Remember, when you measure your wrist, before you start cutting your paracord, add one inch. This will give you enough material in the bracelet to cover the magnets, and still have it fit around your wrist.
2. Lay your paracord flat on the table, instead of suspending it. This will make adding the magnets infinitely easier.
Stop once you have tied the first knot of Step 3 of this tutorial, or, if you're a paracord veteran who doesn't need it, once you've tied the first know between the buckles.
 Here's the tutorial I used: https://www.operationgratitude.com/wp-content/uploads/2011/04/HowtoMakeaParacordSurvivalBracelet.pdf

Once you've got it started, take your first bar magnet. You want to push it between the two strings in the center of your bracelet that you're tying knots around. You can hot glue it in place, if that makes it easier to hold. Then, continue knots over both strings and the magnet. The strings should end up on either side of the bar magnet, with the knots holding the whole thing together.


When it looks like you've only got one knot left on a magnet, slide in the next magnet right below it, and keep tying. Don't worry if you run out of space for magnets. Just continue tying over the string until you reach the end, then finish like any other paracord bracelet.

If you want, you can also add a magnet to back of the buckle like I did, but, at least for me, it was more of a hindrance than a help. The paracord keeps the magnets from getting scratched, but it's not thick enough to negate the magnetic effect. It's heavy, but not too heavy. And it's definitely been helpful for keeping screws on hand when I need them, while not letting me take them home in my pocket. It's definitely an accessory I'll keep on wrist when I need it.

Wednesday, August 20, 2014

Review: Our Final Invention by James Barrat


There are many different books about the robot apocalypse, but few are so well researched, or as urgent, as Our Final Invention, by James Barrat. I have a passion for Artificial Intelligence, probably born from too many Sci-Fi movie marathons. The philosophy mixed with the science and the unknown excites me. But Barrat doesn’t exactly come from a pro - AI viewpoint. He believes that AI will be the last technology developed by the human race. Our Final Invention is a book about the dangers of Artificial Superintelligence, when machines surpass human capability to predict or control them. It aims to educate readers about the most current AI research, while moving them to act on the dangers that could appear if the research continues unchecked. Was it successful? 


The first thing I noted about this book was that it was very easy to read. Even though the material covered is sometimes complicated and advanced, the analogies and writing style is easy to comprehend. Some of the ideas are a little harder to digest once you understand them, and I think part of that has to do with the reverse-chronological path Barrat takes through the topic. He starts with something called the "Busy Child" scenario: a situation where a super-advanced AI decides it can't achieve its goal in confinement, tries to escape it's human captors. For this chapter, and the next two or three, I was rampantly annoyed. Every few sentences I found myself saying "Yes! But..." See for yourself! The chapter can be read online here.


The problem is that Barrat makes his claims in a sensational, provocative tale BEFORE he gives you the facts he has to back them up. And facts he has. His research covers the political, technological, and social ramifications of AI, from futurists to researchers to what's already here. Late in the book, he has a chapter comparing future advanced AI to the current rising problem of malware, and it is brilliant and terrifying. Once I read the rest of the book, I had to go back and reread the first few chapters. What I hadn't seen before was this: When Barrat says AI, he doesn't mean the kind that controls industrial machinery, or even government drones. The kind that has built in safety precautions from a savvy engineer. He is talking about the hundreds of researchers trying to skip the middle step, who are only concerned with developing human level intelligence as fast as they can. With that precinct, the "Busy Child" scenario becomes much more real. 


Now this is not a perfect book. One thing that annoyed me was Barrat's claims that we shouldn't anthropomorphize AI, shouldn't assume it would appreciate us, or even consider us worthy, when a few chapters later he was discussing the four basic drives of AI, which seemed rather anthropomorphic to me. (And don't even get me started on the gross oversimplification that is "friendly AI") And only the last chapter of the book is focused on ways to stop this impending doomsday. I wish there had been more discussion of prevention, of precaution, not just an afterthought, because I do believe that this isn't just going to become relevant in five years - it's relevant NOW. Back to government drones - or even worse, Amazon's proposed domestic drones - what happens if one of these drones is captured, and destructively reprogrammed? If it becomes slave to a botnet? These are the concerns Barrat feels moved to act on. Does his book succeed at moving others too? I'd say... yes, but not how you'd think.


Because it's worth noting that immediately after finishing this book, I went out to the nearest bookstore and bought an AI Textbook and a Lisp coding primer. Our Final Invention is a great introduction to real-world AI. And even more than it made me want to try and save the world, it kind of made me want to destroy it. I desperately want to be one of those hundreds of researchers on the cusp of tomorrow. I want to help Artificial Super-Intelligence come into being. I want to ask all the hard questions about consciousness and intelligence. And now I want to consider, and prepare for, the consequences of doing so. If Our Final Invention has done anything, it's made me more conscious of what we're creating. That's why anyone interested in AI, even just in passing, should read Our Final Invention. It gives everyone the knowledge to make their own decisions about AI, and the risks involved. Because, while I'm not saying your Roomba's going to challenge you, someday soon, who knows? It might be able to.

Friday, August 8, 2014

Practice Project with Mindstorms


It turns out I prefer busy summers to boring summers, but I also tend to go a little overboard. So if this poor blog seems abandoned, that's because it is! But it's time to fix that.


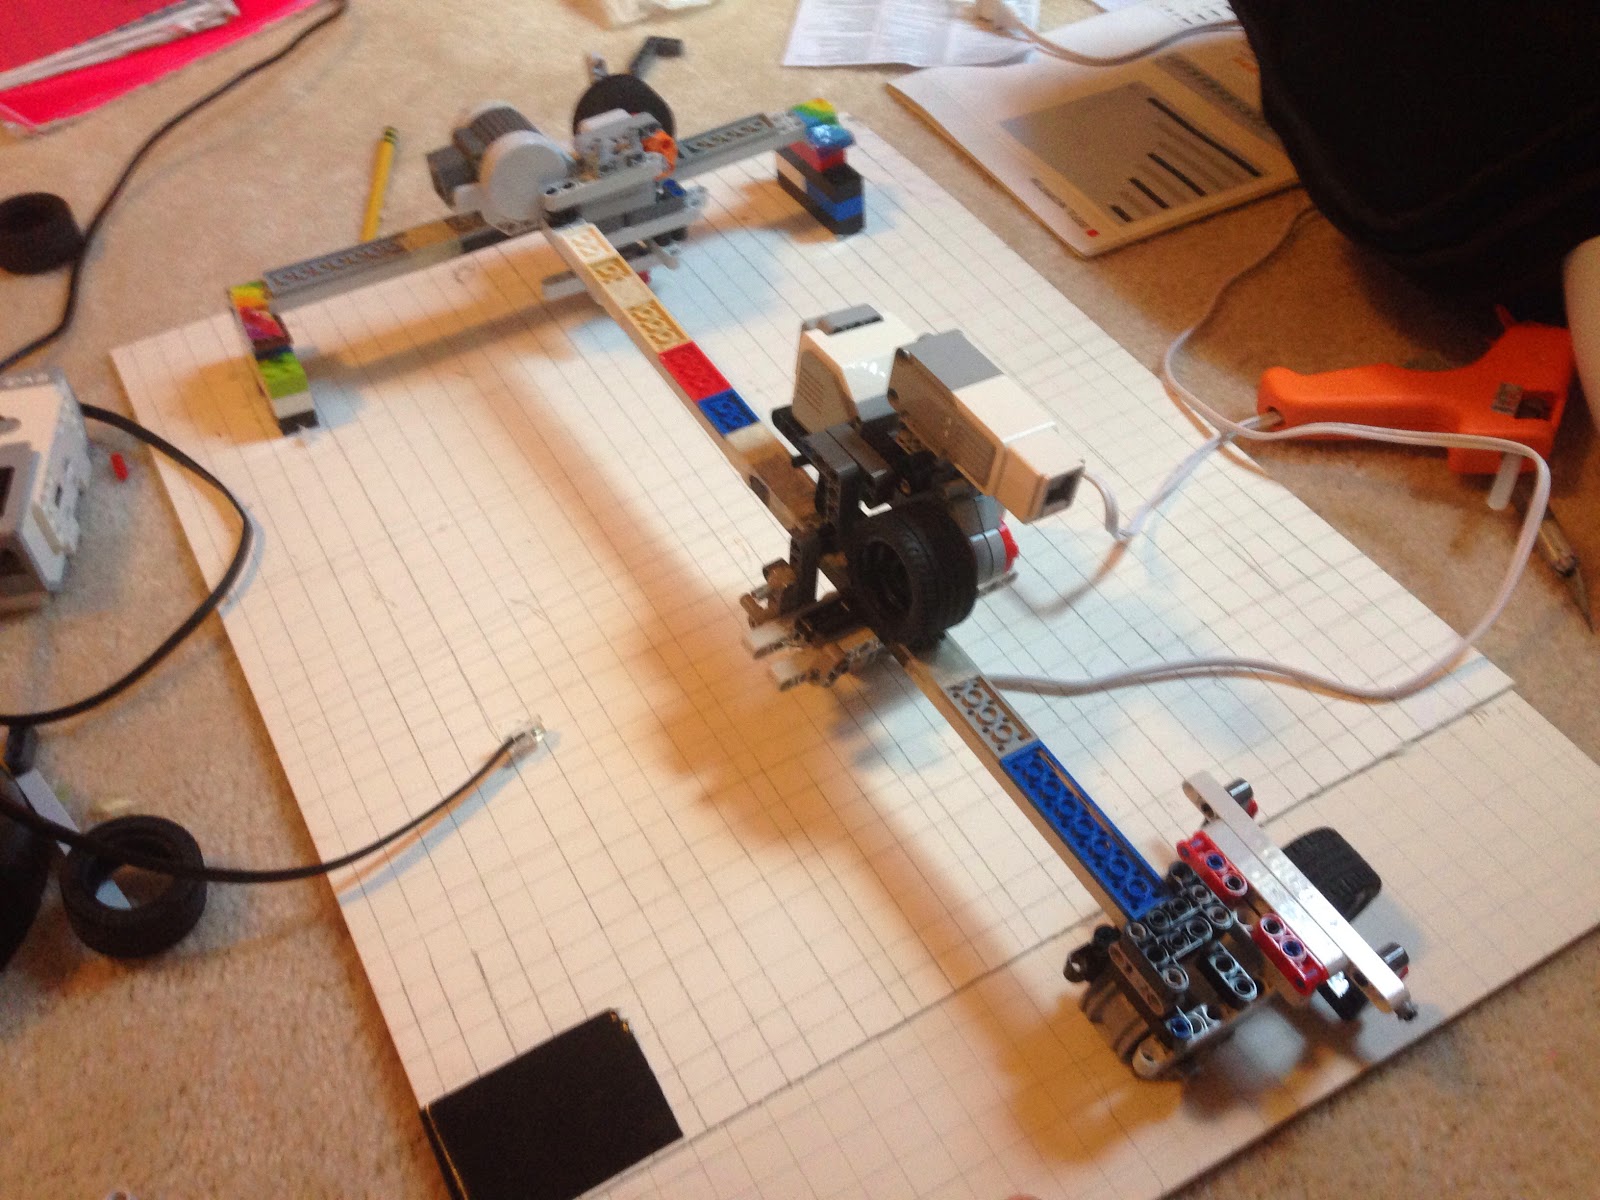
This project was supposed to be a  sort of automated set of drawers. A grid would sit over them, holding the drawers. The two motors could move to a certain "coordinate" to let the third lift the drawer. Overall, I was able to make it work well in concept. But I'm abandoning the project in its current form for now, just because the limitations of the Mindstorms kits and my own time and resources have made it difficult to complete.

I've noticed that the Mindstorms kits are optimized for compact robots. The pieces fit together with a fair amount of wiggle room, but if you aren't wedging anything inside that would allow them to move, you're fine. However, if you want to build a machine with a longer arm protruding from it, the leverage can cause connections to bend or even snap open. This made my plan of having one motor moving a bar holding the others difficult. As you can see in the video, the bar twists the motor holding and makes accurate movements difficult. 


Another difficulty I had was with the Mindstorms software. What I was looking for was a way to input a command from my computer that would trigger a method in the robot. While there is a Bluetooth connection option for the brick, it doesn't let me contact the brick with a command while the program is running, as there's no text input function. In the end I settled for inputting a "code" through the pressure sensor, so the robot would move to a position dependent on the number of times I pushed the button. This worked fairly well. This is the code I wrote that does just that.


The awesome people on the Google + Makers forum suggested I use MIT App Inventor, which lets any android device communicate with the brick through Bluetooth. This is a great idea! BUT, I regrettably have no android device on which to test this capability. I'll have to cross my fingers for my birthday. 

The video shows the last test I did of the robot. The design is... Not great, because I had to keep dropping and coming back to the project, and every time I would get halfway through fixing a problem, and have to stop for the next camp or class.
The robot did better in earlier tests, before the bars started rubbing the nubs away on the Legos holding them together! Great. And now that I'm trapped between eschool, drivers ed, and another super secret  project (coming soon!) that requires lots of time commitment, I decided to give this project a break. I'd like to come back to it at some point later, probably using an arduino and an upright set of drawers. I've got a few ideas written down. But for now, I'll just consider this project a good exercise in programming and design, and 
move on.
Up next: an upgrade to an old robot, a super secret project, and a book review to finish up the summer.

Tuesday, June 24, 2014

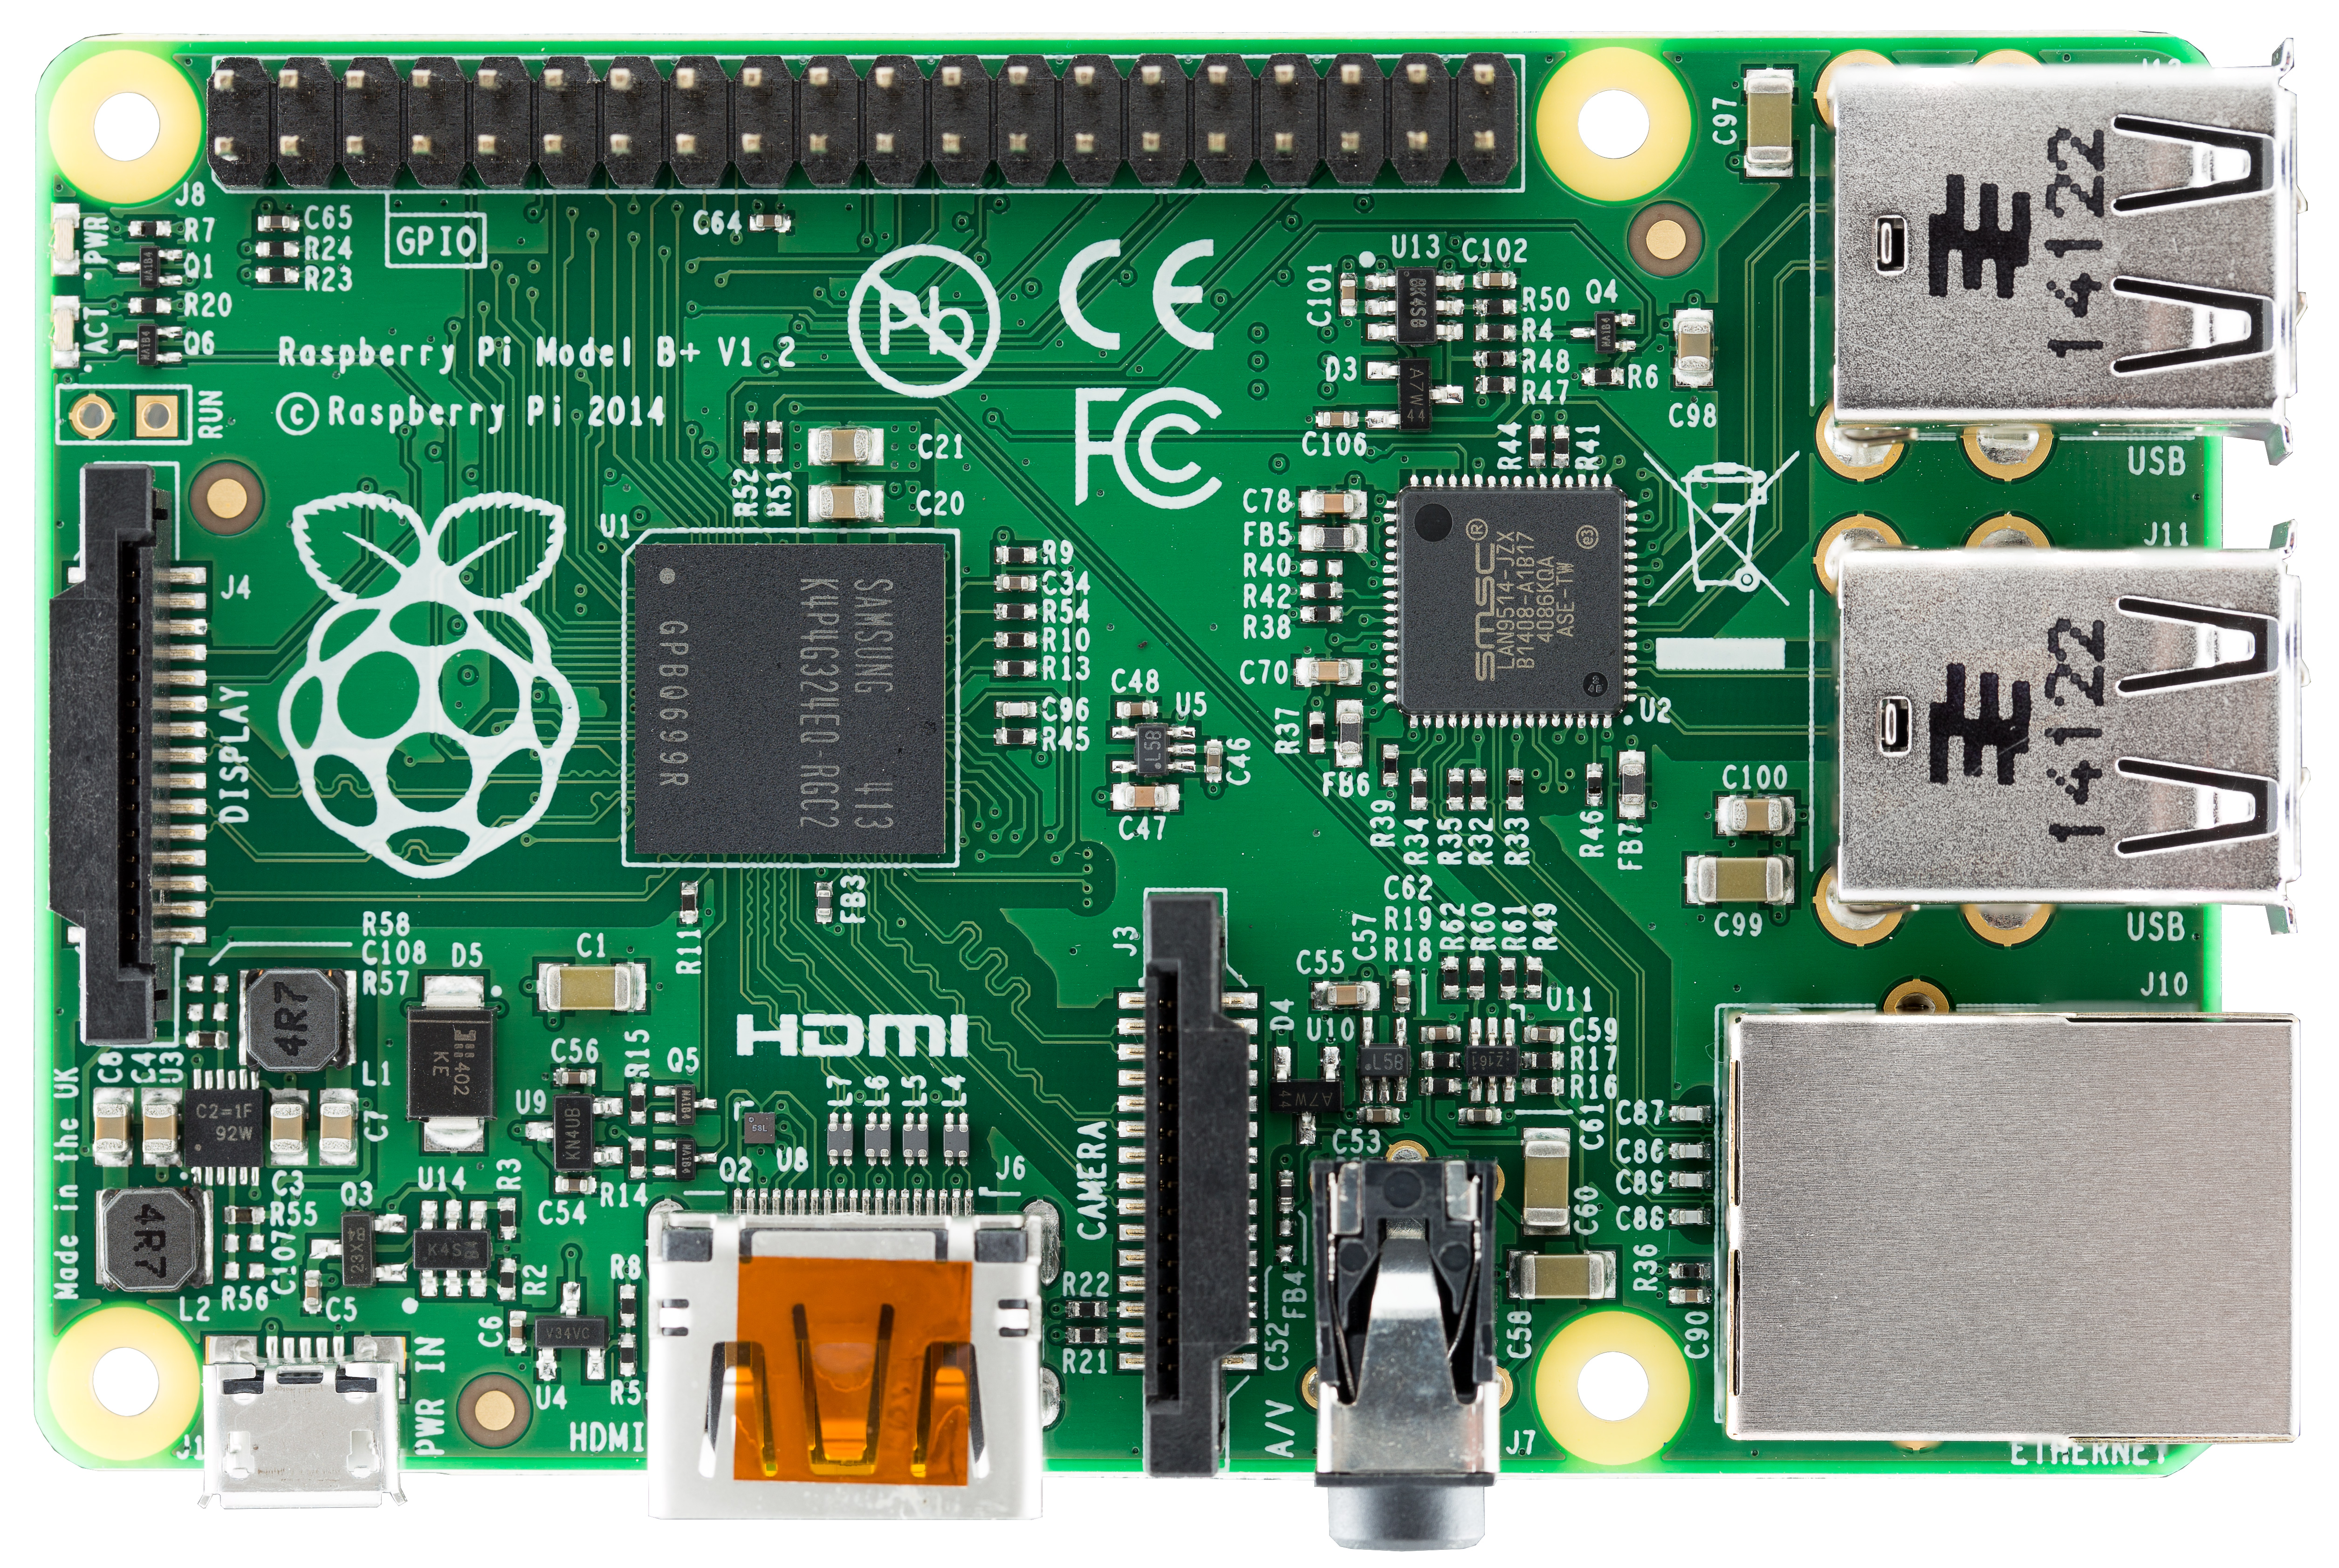
Finally set up my Raspberry Pi!

From this:


To this:


In just three hours of "why doesn't the pound key on my keyboard work?" "I commented out the overscan code, why won't it fill up the screen?" (Pro tip: the Raspberry Pi defaults to the Great Britain keyboard interpretation if you don't tell it otherwise, and use an hdmi cable if you want any control over your screen)

I got the pi for my birthday, but I want sure until recently what I wanted to do with it. I've decided I want to try combining it with my arduino hardware to automate the blinds, lights, etc. in my room. I can't really get going until I finish up with my month of summer camps though. Expect a theatre tech projects after next week, as soon as camp gets done and I can finally take a nap.

Tech Theatre Camp 2014!


Finally, my summer begins! I've spent the past two weeks at three different camps, so my schedule was a little busy. This last week, I worked with 84 other students (20-something other technicians) for eight days, 9:00 to 6:00, to put on four one-act plays with full sets, sound, and lighting. It was understandably pretty brutal, but a great experience overall, and I got to work with a lot of awesome people making some really awesome things.

The show I was assigned to, although I worked on all the sets and helped out with every show, was a cut version of Urinetown, a silly musical we turned into a 40 minute play. I was specifically assigned to be the lighting technician.

The first thing we did at camp was a tutorial on google sketchup, which we were supposed to use to make a preliminary set design to present to our show's director. I've used sketchup for projects before, so it wasn't a big deal. I don't have the design for Urinetown on my computer, but my theatre teacher, the head technical director at camp, had me start designing sets for next year's shows while I was there. Here's a rough idea for Gossamer's giant door, for our first show, that I made in the class.


Next we started actually designing and building for our show. Urinetown had the most complicated set and lighting out of all the shows, and the director had some very specific ideas about the set, so we didn't do much in the way of "design" so much as "build and hope the director likes it."


The base of the set was some stacked "metal scenic pieces" (we weren't allowed by the district to use scaffolding in the set, but some rules were meant to be bent) 


The tech director wanted to have two 8' by 8' doors hinged to the legs of the inner platform that we could swing to either side to represent different locations in the show, but the director thought it would cover too much of the scaffolding. I suggested hinging two 4' by 8' flats to the outside platforms so they would close and open easily. The idea made it into the set.


This was the Tech director's idea, and I ended up building it. The school we were working at had some jail blocks left over from "Chicago". We stacked them on top of one another, and spray painted plastic sheets to stretch behind them. The whole thing was backlit by a source 4, so that when a character gets pushed off the scaffolding and is harnessed, he falls behind it and you see his silhouette. It looked really cool onstage.


The director wanted the secret hideout sign to be really, really obvious. We cut out the arrows and the sign, painted them, and then strung lightbulbs  across them. For each lightbulb I used a tomato corer (which is a real life kitchen implement??) to poke a hole in the foam, pushed the base of the light through it, and screwed the lightbulb in.
I don't have any pictures of it all lit up yet, or any of the lighting work I did for the show, because by then I was too busy to take the pictures. There was a staff member who was the designated historian, who took a LOT of pictures, but I doubt I'll get them until I get back to school. I promise I'll post them as soon as I get them though.


This is the most 'complete' picture I have of the set. The final version had a wall that flew in underneath the secret hideout sign, and the swinging doors were painted. 

I was excited to try lighting, because it was something I'd never had the chance to try at school. I gave my stage manager a heart attack because I didn't know how to write down cues, and I was pulled away from paper tech to make the 'moon' for another show ( which turned out to be a three hour ordeal in hand sewing that ultimately was cut ) and again to reupholster chairs (the reason I didn't know how to write cues was that this happens A LOT even at school) 

In the end the show went great. The only major hiccups were that a rig that made it rain on the top of the scaffolding broke halfway through the show and started spraying water backstage. I panicked and missed a cue, but once it was fixed, the show ran perfectly. The actors were amazing, my team did really well, the audience loved it, and, at the awards ceremony after the show...


I was one of 8 technicians to win an Exemplary Tech award, and the only student to win both that and the Callback scholarship, awarded to one technician and one actor, which means I get a full ride to next year's camp. (You can see me holding the certificate and gold 'C' onstage, which I thought was a horseshoe throughout most of the ceremony and treated it as such.)

And I definitely want to go back next year! I loved the jobs, loved the people, and as busy as I was, I was having fun the entire time. 


Saturday, June 7, 2014

Useless Lamp - Mindstorms EV3

For our final project in one of my classes, we had to create an art piece based on a movement we studied. I picked Dada, and this is my project, Lamp. Here's a video of it in action.


I built the project using two mindstorms large motors and a pressure sensor. There are two halves to the mechanism - the "useless box" half, and the half that controls the lamp. The lamp in particular I used had a wheel switch that I had to to try three different ways of operating, finally taking it apart and reworking it as a button. The box decorations are made of vinyl and fabric I had lying around the house. I'm only going to talk about the mechanisms involved in making your own useless lamp. The rest is up to you.


Friday, June 6, 2014

Feature Friday: An NSA Sarcasm Detector?

There's a number of reasons why using social media as a method of finding potential criminals is both ineffective and dangerous, but the NSA seems intent to try and do so anyway. I'm not here today to discuss the ridiculousness of monitoring huge quantities of junk data for a threatening tweet, or the terrifying potential repercussions for the person who makes one too many jokes about the security inspection at the airport. I want to talk about the NSA's search for a twitter sarcasm detector, and whether or not such a program is feasibly possible, and how effective it could ever really be at filtering joke threats from the real ones.

First, lets pull up a definition of sarcasm.

sar·casm

 noun \ˈsär-ˌka-zəm\
: the use of words that mean the opposite of what you really want to say especially in order to insult someone, to show irritation, or to be funny

It's understandable why the NSA would want to avoid lawsuits by filtering out everyone who didn't actually MEAN their threats. But, the difficulty with machines recognizing sarcasm comes in two parts: 

One, sarcasm relies on the context in which it is made.


This is an easy one. No one wants to have to wait for their food, right? We construe that as a negative thing. So, someone acting excited or happy about their food being late is being sarcastic. 

However, sometimes it can be more difficult. If I say "Wow, great new plan by the NSA," if you don't know specifically which plan I'm referring to, my opinion on or views previously expressed about the issue, or even what community or scenario I'm speaking in, you might have a very hard time telling whether or not I'm being sarcastic. Then tie in allusions I make to other situations or pieces of media that need the same amount of context to be understood. It's not looking GREAT for the NSA right now.

Two, many people like their sarcasm as subtle as possible.


Some trolls will a satirical account where they try and make as many people angry as possible through their content to get views. Meticulous troll sarcasm can be difficult even for human users to spot, but for machines, it can be downright impossible, as they wouldn't use #hashtags, italics, WAAAAYYY OVEREMPHASIZING, or other clues the more sarcasm sincere might present. Imagine Jonathan Swift's " A Modest Proposal." An important piece of satire, but how many HUMANS thought it was real when it came out? 

This isn't to say that a computer CAN'T find sarcasm on the internet, but it's harder than it might look at first glance. 


A couple of projects like What Does The Internet Think and SyFy's Twitter Popularity index have already attempted "mining the sentiments" of social media. As this awesome article states, it's complicated, and while SyFy doesn't have the authority to arrest people if its program goes wrong, that's not the case for high-stakes web-terrorist stakeouts. As seen above, going by sentiment mining alone, half of  internet users are neo-nazis. (Note: This demographic is only accurate for youtube commentators so far as I can tell. Sigh.) 

The NSA can sink its money into making a complex, brilliant program that searches phrases and hashtags and formatting, tracks the sentimental tweets of users and their internet searches to determine their views and opinions, connect media references to their sources and the context involved there, link accusations of trolling to offenders and evaluate their veracity. They could sponsor the creation of an incredibly intelligent machine, and that is why I've included their claims as my feature today. I want this program to be made. But I don't want it in the hands of the NSA. 

In Cory Doctorow's Little Brother, he discusses the potential implications of a world where your every move and search is tracked, and analyzed for threats. Even as the tracking technology of the government improved, there were still so many false positives and negatives. .01% of a billion is still a huge number of people being put on the blacklist. And people kept finding new ways to trick the system. If the NSA gets its sarcasm detector and even one threat is missed, even one comment misconstrued, the first protest will be from those who make their sarcasm more complicated, harder to detect. So the NSA makes a new program. It's a battle without a winner. 

So don't let the silliness of such a request fool you. It CAN be done, and it WILL be dangerous to the neutrality and safety of posting even stupid things on the internet. This battle hasn't come to a front yet, but if you're interested, there are other battles being waged right now. Start with this petition on net neutrality. And please, whatever sarcasm you choose to use, don't threaten violence where it could be misconstrued. If not for the NSA's peace of mind, then for mine, and the 7 billion other people on earth who might take you seriously and react accordingly. Stay free, internet, and I'll see you next week!