Showing posts with label Weekend Project. Show all posts

Sunday, September 21, 2014

The Theatre Tech Magnetic Survival Bracelet

I'm a sucker for simple solutions for even the most superficial problems, so when I saw this magnetic bracelet for holding screws and nails during projects, I was sold from the start. But I needed something before I had to go work at the Children's theatre the next night (summer jobs, guys). Plus, that bracelet looked heavy, slippery, and easily scratched up. So I made a quick raid through my craft box, and ended up with The Theatre Tech's Paracord Survival Bracelet.


Pretty sweet, right? And it's magnetic enough to hold even 3in  screws in place while you walk around. 


Here's what you'll need:

Paracord (Measure around your wrist in inches, taking into account the fit you want, and, for this project, add an inch. Cut a foot of paracord for each inch. Ex. If your wrist was 8 in in diameter, you should cut 9 feet of paracord) Pick a color that makes you happy!


A Side Release Buckle (Mine was cut off an old backpack, wider is better for this project)

8-10 STRONG Bar Magnets, about an inch long each.
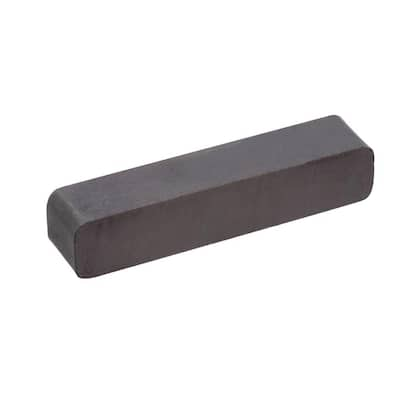
And your tools:

Hot glue (optional, but recommended)

A pair of scissors

A lighter or match

Measuring tape or ribbon

Start your bracelet like you would any other paracord bracelet, with two big exceptions:
1. Remember, when you measure your wrist, before you start cutting your paracord, add one inch. This will give you enough material in the bracelet to cover the magnets, and still have it fit around your wrist.
2. Lay your paracord flat on the table, instead of suspending it. This will make adding the magnets infinitely easier.
Stop once you have tied the first knot of Step 3 of this tutorial, or, if you're a paracord veteran who doesn't need it, once you've tied the first know between the buckles.
 Here's the tutorial I used: https://www.operationgratitude.com/wp-content/uploads/2011/04/HowtoMakeaParacordSurvivalBracelet.pdf

Once you've got it started, take your first bar magnet. You want to push it between the two strings in the center of your bracelet that you're tying knots around. You can hot glue it in place, if that makes it easier to hold. Then, continue knots over both strings and the magnet. The strings should end up on either side of the bar magnet, with the knots holding the whole thing together.


When it looks like you've only got one knot left on a magnet, slide in the next magnet right below it, and keep tying. Don't worry if you run out of space for magnets. Just continue tying over the string until you reach the end, then finish like any other paracord bracelet.

If you want, you can also add a magnet to back of the buckle like I did, but, at least for me, it was more of a hindrance than a help. The paracord keeps the magnets from getting scratched, but it's not thick enough to negate the magnetic effect. It's heavy, but not too heavy. And it's definitely been helpful for keeping screws on hand when I need them, while not letting me take them home in my pocket. It's definitely an accessory I'll keep on wrist when I need it.

Sunday, April 27, 2014

Make a Heated Cat Hammock

This was a quick weekend project I whipped together for my cat, who's gotten more arthritic and ornery the older she gets. She took up the habit of lying on my Mom's heated throw blanket and biting people whenever we moved her, so I built this as a peace offering.


Parts:

Four 1/2" Dowels, cut to 8" long
One 15" diameter round wood thing
Two approx 18" squares of fleece
A heating pad
Four 1" screws
A screwdriver
A drill
A 1/2" drill bit
Power

Instructions:

First drill the four holes into the base of the hammock. Each hole should be about 1.5" away from the edge of the base, and should make a square as shown. Drill in at an ANGLE of about  60 degrees, and stop when you hit the bottom.

Next go ahead and attach a screw into each dowel. The screw should stick out about a half inch , so that it can be used to mount the hammock. I place my screws about 3/4" down the dowel, but it can be moved up for larger cats or down for smaller ones, so long as each screw is about the same height on the dowel.


Next slide the dowels into the base. You can use glue if you want, but I found that mine didn't need it. Make sure that the screws face away from the base.

Cut strips about 1" wide and 2" long down each side of your fleece squares. Line them up and knot them together on three sides, pretty side out. If you're having trouble, look at these instructions.

Slip the heating pad through the remaining open side. I had to fold mine in half. Make sure the power cord is still accessible, then knot the remaining side closed. Mount the hammock by slipping one corner knot over each dowel. You may have to stretch the fleece to do this. The knot will stop sliding at the screw, so that your heated cat hammock sits suspended and comfy.


If I come back to this project later, I think I'll add a primitive pressure sensor and wire it to a relay, so that I don't have to turn on the heating pad when the cats climb in - it'll turn on all by itself. To do that, though. I would need a different heating pad, or I'd just need to rewire the controls on this one, which requires you to press a button to turn on.  


Here's a picture of the wrong cat, Nicodemus, sleeping in the hammock to spite his sister.


And this is Skitty, who wouldn't climb in until I put her there, and wouldn't leave once I did. You're welcome.